Monday, June 2, 2014

Upcycling Summertime Project for Kids: Pop Top Bracelets


 Happy June!
 Here's a fun summertime arts and crafts project to do with kids (or on your own).  It involves up-cycling soda can tops, also called pop tops, into bracelets.  This project is easy for both boys and girls and makes a great gift for the crafter or someone special in their lives.
While far from a traditional Waldorf craft, these pop top bracelets are woven together with ribbon and help children practice finger dexterity and patterns.  They show how "trash" can be turned into "treasure" and offer a unique starting point for a dialog about reducing, reusing and recycling. 
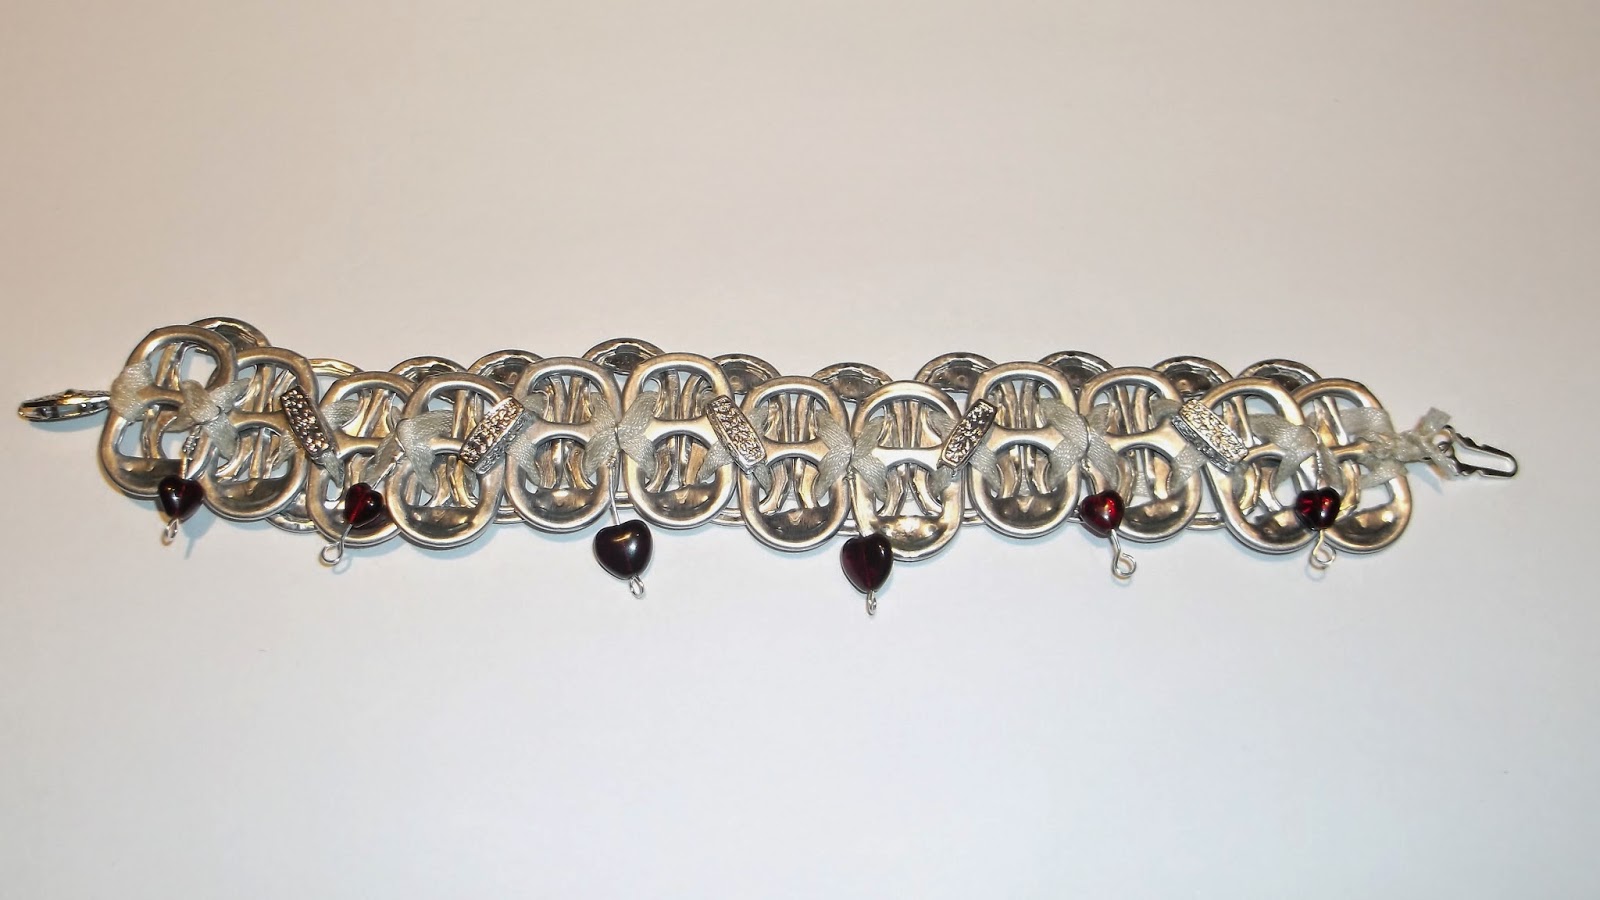
https://www.etsy.com/listing/191645994/red-heart-silver-bead-charm-pop-top
Before you begin you'll want to collect about 30 pop tops per bracelet.  Wash them and use a small hammer to flatten out any sharp edges.  If you're working with older kids they can help with this stage.  Next cut a piece of ribbon about 3 feet long and slide a clasp onto the ribbon letting it rest in the middle.
 Next tie the ribbon with the clasp onto the first pop top.
 Lay the tied pop top on top of an upside down pop top.  Be sure that the holes are opposite each other.  See the picture below where the small hole is on the bottom of the top pop top and on the top of the bottom one.  Rough sides face inside, the smooth sides of the pop tops face out.
 Now thread each side of the ribbon through the bottom pop top and then through the top pop top.  (In the picture below the pop tops from the above picture are flipped over.)
 Below is a picture of the pop tops flipped over again to see what it looks like when the ribbon comes up through the top pop top.
 Now get a third pop top and use the ribbon in a crisscross pattern to connect it to the first pop top, being sure to thread the ribbon down through the bottom pop top (the bottom pop top is the second one you put on).
 Get another pop top and place it next to the bottom one.  Weave the ribbon onto the new pop top and back up through the third pop top.  With the exception of the very first and very last pop top, the ribbon always goes through two pop tops at a time.
 Time to crisscross the ribbon again.  
If you like you can add an accent bead here.
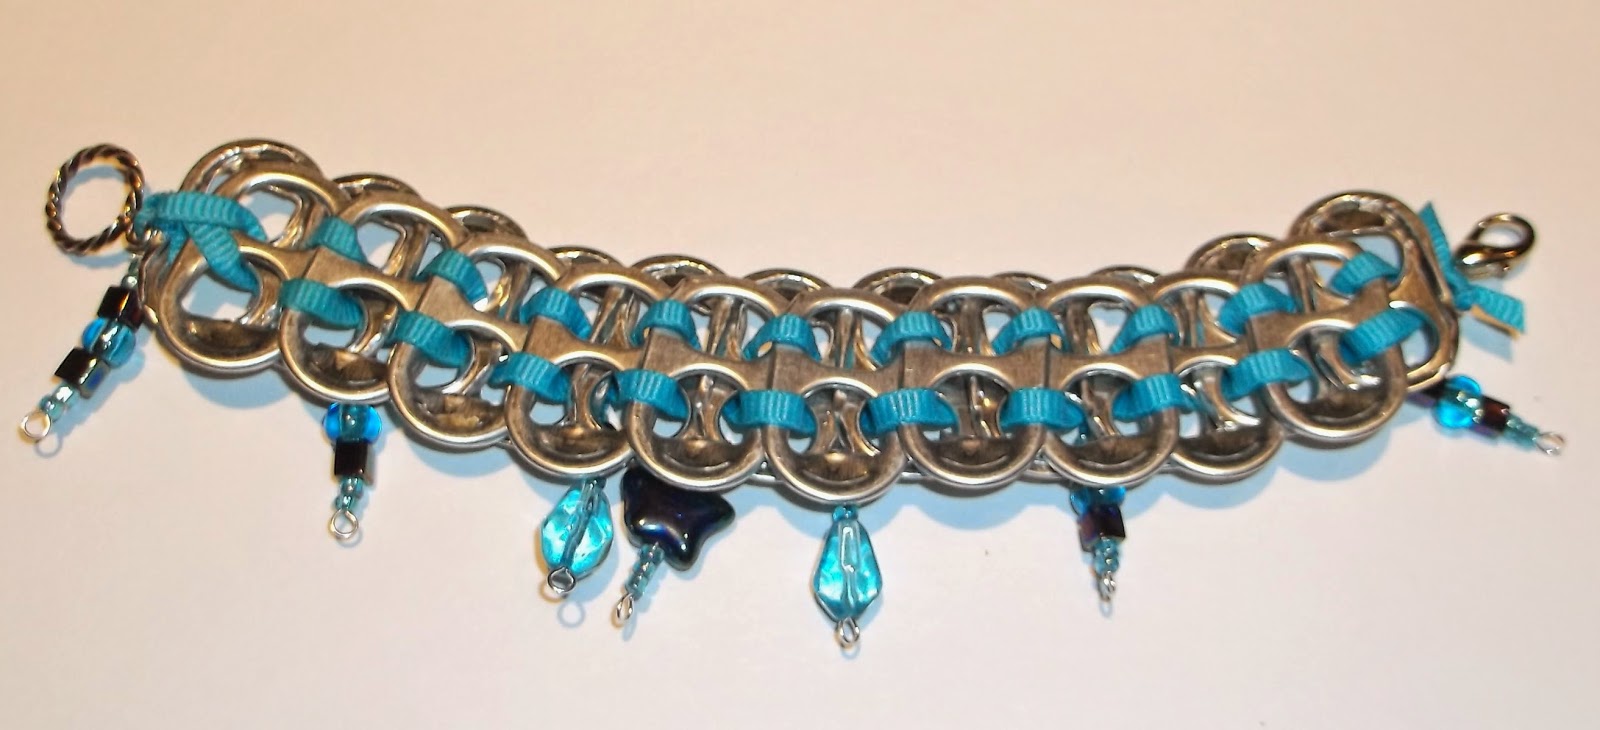
 Keep up the pattern of weaving through the pop tops, crisscrossing on the top layer but not on the bottom.  The picture below is how the front or top layer should look. 
The picture below is how the back of the bracelet will look.  Remember that the smoother side of the pop tops always faces out, the rougher sides will touch each other.
https://www.etsy.com/listing/191651101/upcycled-pop-top-bracelet-with-blue
Once your bracelet is as long as you'd like it to be, put a knot in the ribbon and then attach the other side of the clasp.  If you don't have any clasps you can omit this step and simply tie the ribbon together.  You can use wire, string, or ribbon to attach more beads or charms to the bracelets.  Or keep going and make a necklace :)
https://www.etsy.com/listing/191645994/red-heart-silver-bead-charm-pop-top
 Thanks for visiting and happy crafting!
If you'd like to purchase either of the pieces displayed here, please visit my Waldorf on Etsy shop:  BeadCanyon
or connect with me on Facebook
Enjoy!

Wednesday, April 9, 2014

Making Granola with Your Kids

Today we feature a post from Lila Kids.  It's a great activity to share with your children ~ Enjoy!

Every few weeks in our house we make a big batch, sometimes two, of granola. I enjoy making this with my daughter because the quantities are so flexible. The granola is going to taste just as good if some of the oats end up on the floor instead of the mixing bowl and your sous chef eats a large amount of the coconut. And it's incredibly easy and fast. We eat ours on top of plain yogurt, which my husband often makes for us, with raisins or berries. A really delectable treat is Belgian waffles (again made by my husband) topped with yogurt, granola, and strawberries. Strawberry season is still a long way off around here, though.
My daughter wears one of my early sewing projects--an apron I made when she was about three. Even then she could put it on herself because of the elastic neck strap and the velcro waist strap. It still fits her just fine now that she is nearly six. When she was littler I think wearing the apron made her feel like a big girl and a big helper, but now I'm pretty certain she wears it because she knows it's practical. There are quite a number of chocolate stains on hers.
We mix our granola in a mixer with the bread hook, but you could use a really large bowl. I did that for years before we got our mixer; it works fine but it's harder and more time consuming. 
My daugher's apron fabric is from a designer called Unison and was handprinted at the textile mill near my house. I bought the pink fabric before I opened my Etsy shop, and I haven't seen it at the mill since. I really like it, but I don't have any more in that colorway. I have it in a forest green/mint green combo and in a light grey/red-brown combo, but no more pink. The child aprons in my shop are identical in style except most of them have a sweet little pocket in front.

After we mix all the ingredients we spread it out on a large sheet pan. And then we sweep up the floor under the stool!
Here is the recipe.

Mix thoroughly:
4 or 5 cups rolled oats
1 cup sesame seeds
1 cup wheat germ
1 cup sunflower seeds
1 cup unsweetened shredded coconut
1 cup chopped nuts (we use pecans, but some folks might like hazelnuts)
1/2 cup oil (we use coconut now but have used canola in the past)
1/2 cup liquid sweetener (honey, agave, and maple syrup are all good)


You could also try adding flax seeds or pumpkin seeds. I have made the recipe above, substituting the nuts for the pumpkin seeds so my daughter could take it to school.

Pour into a large sheet pan and bake for 1 hour in a 300 degree oven. Every 15 minutes, take the granola out and turn it with a large spatula. Let it cool before storing in an airtight container. Doesn't it look fantastic? Too bad you can't smell it!!

It makes a great gift in decorative containers and it's brilliant to serve at brunch--so easy. Enjoy!
A special thank you to Lila Kids for sharing this great post with us!

Thursday, February 27, 2014

Storytelling with Props


Verbal Storytelling with Props 
A few ideas to get you started
 By Cheryl Jackson 
of
Children love stories – whether reading books, listening to story CD’s or having stories told to them. We as parents and caregivers know that stories feed the imagination of children and provide strong foundations for children’s own storytelling, as well as rich and varied language development and a love of books. Sharing stories is also great fun!
 A different approach to stories is making up your own whilst incorporating characters and props in scenes for your children to watch. This can be really personalized for the children and you can pitch the story just right for their attention spans, ages and interests. However it can be a bit of a scary prospect for a novice storyteller! So here are a few ideas to get you started.
https://www.etsy.com/listing/164419528/needle-felted-stone-gnome-in-his-home?ref=shop_home_active_1
Step 1:  Setting the Scene
As you'll see in the photos below, your story can take place anywhere. There should be a defined stage for the story to be enacted upon and a comfy seating area for the audience to sit. In the stories above I have used my dining table while the children sat on the chairs, the sofa and low table with the seating area being cushions on the floor, outdoors on the patio with waterproof fabric to sit on and my seasonal table shelf with beanbag seating. It is enough to suggest the scenery with appropriate colored fabric pieces, natural materials and simple shelters made from folds of fabric, piles of stones, boxes, building bricks etc. The children have great fun guessing what the story will be about as they watch you set the scene.
To populate your stories you can raid bits from the children’s toy boxes or have a special set of figures, animals, etc. that are kept just for telling stories with. You can hand make your own characters and scenic objects – in the stories below I have used felt dolls, needle felted animals and folk, and clay models. Whilst the children model clay or thread felt necklaces, they like to watch me make new props and people for the story basket.
Step 2:  Telling the Story - Seven Story Ideas to Get You Started:
A Winter’s Tale 
Grandma and Grandpa’s day in the snow, caring for the hungry animals, fetching firewood and making tea.
https://www.etsy.com/shop/softnwoolly
How about a story about a family’s daily activities involving the seasons, festivals and your children’s own daily activities. The family characters can reflect your own family make up and include pets and friends. This type of story can be told daily or weekly and awaken children’s awareness of the cycle of the year and the rhythm of their home life.

At the Construction Site 
A handbrake left off and the empty car rolls over the cliff, how the diggers and trucks work together to move the car and take it to be repaired.
Children who enjoy playing with their favorite small world toys love to see them starring in a story. Seeing new possibilities for ways of using these toys helps children to develop their own narrative threads and enriches their play.  Other vehicles, animals, dolls, houses, soft toys, pirates, knights etc. can be used.
The Spider’s Web
How the spider tried to trap the bee in his web and how the other insects saved the bee.
                             
A story can be educational, building on a child’s interests and adding new factual knowledge in a fun way. This type of story can broaden and support topics being learnt at school, perhaps awakening enthusiasm for a subject they find difficult or tedious. Think water cycle, homes and shelters, counting, mini beasts – take time to make sure you understand the subject and have your facts right before you start!


The Lamb Who Never Listened
Naughty lamb never listened to his parents and kept getting into trouble, rescued by the farmer, owl & fawn.
Sometimes children have difficulty in learning acceptable behavior, often in relation to others. Stories that reflect the problems they are experiencing and show how the story characters resolve these difficulties can help a child recognize a new way forward. As well as situations such as sharing and helping others which can positively affect all children, the story can cover a specific issue such as fear of thunder or death of a pet.  Using a gentle, supportive approach helps children who may not want to talk directly about their worries.

Jack Frost and The Snowdrop Girls
How Jack Frost covered the garden in glittering snow and how the Snowdrops Girls swept him away to make Spring arrive.
                           
Fairies, pixies, gnomes, elves, mermaids, witches, wizards – introduce your children to the magical folk that live in your home and garden, maybe only ever seen by children. . . Fantasy worlds populated with dragons and unicorns, full of spells, quests and treasure – add glitter and magic to your children’s imaginations!
Little Red Riding Hood
All the animals warn her about the wolf, the wolf shuts grandma in the outside loo and pretends to be her by dressing in her hat and apron, wolf tries to catch red riding hood, the animals tell the woodcutter, the wood cutter rescues red riding hood and chases the wolf away
                   
A good place to start is retelling a traditional fairy tale. You can use the farm animals, soft toys, dolls etc to retell a story the children know well. Put your own twist on it such as changing the Three Billy Goats Gruff to being about a sheep, a cow and a horse if you don’t have three different sized goat figures. Or maybe the three bears don’t eat porridge but muesli, toast and yoghurt? In your story, Cinderella could have two grumpy brothers and go to the ball in a limo. Allow your children to see other ways to tell a story and that it is good fun to embellish and enlarge on a basic theme.

Step 3: Letting The Children Join In
After the story is finished and you have said ‘The End’, it's the children’s turn. How you do this depends on your children’s age and development, but these are the steps I use as the children grow.
1.  Retell the story and let the children move the characters around the scene.
2.  The children retell the story as they move the characters. At first they just retell key phrases and the bits of the story that interested them the most or the ending which is freshest in their mind, but soon they will remember more of it.
3.  The children will begin to add on their own bits to your story or take the characters in a different direction – it can help if you provide extra props and characters next to the scene so they have fresh ideas to hand.
4.  Don’t forget to role model good audience behavior! Sit still and watch, listen carefully, clap and say thank you at the end of the story. Enjoy your children’s storytelling and discover the events and activities in your lives together that they recall and incorporate into their tales. This can be very surprising!
So gather round, sit yourselves down comfortably and enjoy the story. . .
Special thanks to Cheryl of Waldorf on Etsy shop SoftnWoolly for her wonderful article on storytelling!


Sunday, February 23, 2014

The Extra Lesson

Improving Reading with Physical Exercise
When my first born was four years old he knew the entire alphabet, each letter’s sound, and how to write most of them in capital letters. I beamed and I even told the neighbor “He can read,” much to her disbelief. You see, I figured he was on the cusp if he knew three letters and their sounds. He could easily sit down and put those into a word, right? Four years later we are still learning to read and I’ve learned to be more humble.
I just assumed reading was easy. When I was a girl I loved to read. But, I never knew how I learned to read and I never appreciated language for it’s parts, more for it’s ability to come together to tell a story.  When I was pregnant I read to my son, when he was born, I read to him more. As a toddler he’d bring me tons of books and we’d point out pictures and learn general vocabulary. When he was just three he sat by while I read all of Stuart Little. Naturally, I thought reading would be easy for him, something that would magically happen. 
I’ve since learned reading is a process that involves games, rhymes, rules and repetition. As any mother would, I am always on the lookout for clear, easy and fun ways to teach him reading rules. Imagine my surprise when a fun new way to enhance reading ability arrived in the form of bean bags, crawling on the floor, and jump roping. 
The Extra Lesson: 
As a parent who prefers natural and holistic methods The Extra Lesson really appeals to me. An approach that helps children with learning disabilities, it is also beneficial to those without. For children with ADD, ADHD, Dyspraxic, Dyslexic, Auditory Processing Difficulty, or as Gifted and underachieving, this method works drug-free. For a mother trying to help her son put joy into reading, it works as well. 
As usual, this Waldorf centric approach focuses on meeting each child at his need level. Extra Lesson classes are available at many Waldorf schools from counselors following Audrey McAllen’s Steiner inspired curriculum. The most wonderful part is the exercises are really fun! 
With help from books and websites we came up with exercises we can integrate right here at home. Weekly we are tossing bean bags and doing crawling races around the house. My boys have learned to do Chinese Jump rope and are inventing their own challenges.
Both boys are improving their gross motor spacial awareness which translates to spacial awareness on paper. It’s easy to incorporate the exercises, they enjoy them, and it’s a great addition to our weekly reading practice.
Interested in finding out more about The Extra Lesson? 
Check out these websites: 
Check out these books: 
Take Time by Mary Nash-Wortham and Jean Hunt
The Extra Lesson, Movement, Drawing and Painting Exercises to Help Children with Difficulties in Writing, Reading, and Arithmetic by Audrey E. McAllen.
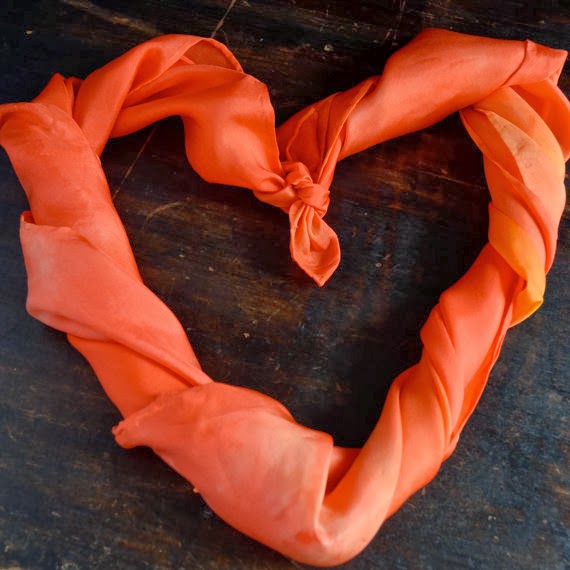
https://www.etsy.com/listing/124204565/play-silk-waldorf-playsilk-autumn-hike?ref=shop_home_active_4
Waldorf Play Silk by Pail and Pie
Special thanks to Brenda from Pail and Pie for this article!

Monday, February 17, 2014

T-shirt Bag Tutorial


T-shirt Bag Tutorial
by Tania Prosser of Fairy Shadow
We all have them, the t-shirts that get left in the drawer month after month, year after year.  Maybe we think the color is unattractive, the neck a little too snug or too loose.  Maybe the design no longer calls out to us to be worn.  Whatever the reason, these shirts are good candidates for upcycling.  (Upcycling is the environmentally friendly art of taking unwanted materials and turning them into better, more useful materials.) Unwanted shirts make the perfect starting point to create your own alternative to plastic sacks.  These simple drawstring bags are easy to make and great for trips to the market, for holding your produce, to store toys, as beach bags, book bags, for environmentally conscious gifting and much, much more!
 
Getting Started:  Choosing Your Shirt
Choose a shirt that is made of jersey material rather than interlock fabric.  Jersey has a knit side and purl side.  Interlock has the “v” shape weave on both sides of the fabric.  The jersey will curl into the cord that will make your drawstring and interlock will not.  Choose a shirt with a sound hem at the bottom of the shirt.  It will form the casing for the cord to pass through.  
Step One:  Cut the Shirt
 
Make the first cut just below the arms of the shirt and then a second cut 1 ½" below the first cut.   
This narrow cut will be the drawstring of the bag.
https://www.etsy.com/shop/fairyshadow
Cut the sides off of both of these cuts, creating two strings and two panels.
https://www.etsy.com/shop/fairyshadow
Step 2:  Fold and Sew
Fold a panel in half and starting at the hem of the shirt sew a straight stitch down to the bottom.  A second seam closes the bag at the bottom, leaving the opening at the hemmed section. 
Step 3:   Thread the Drawstring
Turn the bag right side out.  At either side of the seam make a small hole in the top layer of the casing (hem).  Jersey stretches so it doesn’t need much of a hole to work. 
https://www.etsy.com/shop/fairyshadow
Take up your drawstring and stretch it to roll the fabric.  Using a safety pin or hair pin, thread the drawstring through the casing.  I like to use a contrasting colored drawstring.  Knot the ends together.  I like to add an embellishment by hand stitching a little circle onto each bag.
 
Step 4:  Get Creative
You can use this same technique with the sleeves of the t-shirt for small bags.   
These make nice dry lunchtime snack packs too.
 
Step 5:  Share with Your Community
This project is a great way to introduce children to upcycling.  If your school or community group holds a rummage sale you will often see hundreds of pounds of textiles being offered for sale, much of it going unsold and then donated to charity shops.  Every Goodwill sorting facility processes hundreds of tons of clothing a year.  Consider a class project in which the students harvest from your rummage sale before the final cleanup.  After washing the shirts will be ready for sewing.  If you have fund raising events the students could produce collections of bags to sell at those events, having the satisfaction of both recycling the garments and bringing funds to their school or community group.
A special thanks to Tania for sharing this wonderful upcycling project with us!
Be sure to visit her etsy shop, Fairyshadow for a wide array of upcycled creations.
Connect with Tania via Facebook
  Enjoy!

Monday, January 27, 2014

The Importance of Nature to Children

Connecting the Seasons in Waldorf Education 
by Claudia Marie Lenart
In Waldorf education, we celebrate the changing seasons in the classroom, in the community with seasonal festivals, and in the home.  Waldorf classrooms always include a beautiful season’s table that is decorated with gifts of nature, handmade animals, and items that reflect the present season.  Inspired by the beauty of the classroom, Waldorf parents often find a space in their homes as well for a seasonal nature table. 
The awareness of the seasons and celebration of seasonal festivals has meaning in the Waldorf curriculum.
Recognition of the seasons establishes rhythm for the child and the natural rhythm of life is central to Waldorf philosophy.  Rahima Baldwin Dancy, author of You are Your Childs’ First Teacher, says that rhythmic activities provide children with a sense of security. 
“The slower rhythm of the natural world with its changing seasons can provide the “content” of our experiences, as well as a powerful healing influence,” according to Waldorf Early Childhood Association of North America.
Autumn Family by Soft Earth Art
Awareness of the changing seasons allows children to better appreciate nature and to feel at home in the natural world.  For Waldorf children, daily outdoor play is essential, through the heat of summer and even on the most frigid winter days.  Of course, Waldorf parents send their children to school with boots, hats, scarves, wool mittens –well prepared for the weather.  If the schoolyard has the slightest hill, you will be sure to see the children sledding daily in the snowy months. 
  
Observation of the changing seasons in early childhood provides a foundation for later scientific study.  As the child progresses through Waldorf school, teachers will take hiking trips where students will study and draw the anatomy of a plant or observe weather patterns.  The seasons are a perennial subject for Waldorf watercolor paintings as well. 
Feeling at home in nature throughout the seasons, provides a child with a sense of wholeness and belonging to the world.  This sense of wholeness is at the foundation of Waldorf education and observation of the seasons instills a greater sense of connection to the natural world and to all life. 
Claudia Marie Lenart, Waldorf parent, volunteer, and longtime writer about Waldorf education is a needlefelt artist on Etsy.  Her shop is ClaudiaMarie Felt.

Thursday, January 16, 2014

Happy New Year!

The Waldorf on Etsy Team of artists and craftspeople wish you a Happy and Healthy New Year!  
Winter Fairy from Peach Creations
January is full of the birthdays of many wonderful people who have enriched our lives.  People like Martin Luther King Jr., Woflgang Mozart, Joan Baez, Anne Bronte and Lewis Carroll.
Did you know that Charles Perrault, a Frenchman born in January over 300 years ago collected folk talks and wrote them down in a book called, Tales of Mother Goose?

January is a great month to snuggle up with your kids and read some fairy tales together.    A fun activity for both parents and children is to get out paper and pencil, crayons or paint and create pictures from of the stories you just read together. 
https://www.etsy.com/listing/127568857/12-jumbo-triangular-pencils?ref=related-0
Another fun activity is dressing up and acting out some of the scenes from these stories.  Or using little peg dolls or finger puppets to do the same.

Peace and Prosperity to you in 2014!

The idea to celebrate the birthday of Charles Perrault as well as some of the play ideas are from:  
The Early Childhood Teachers Almanack by Dana Newmann - it's a great book full of activities for the whole year to enrich your child's life!