Showing posts with label upcycling. Show all posts

Monday, June 2, 2014

Upcycling Summertime Project for Kids: Pop Top Bracelets


 Happy June!
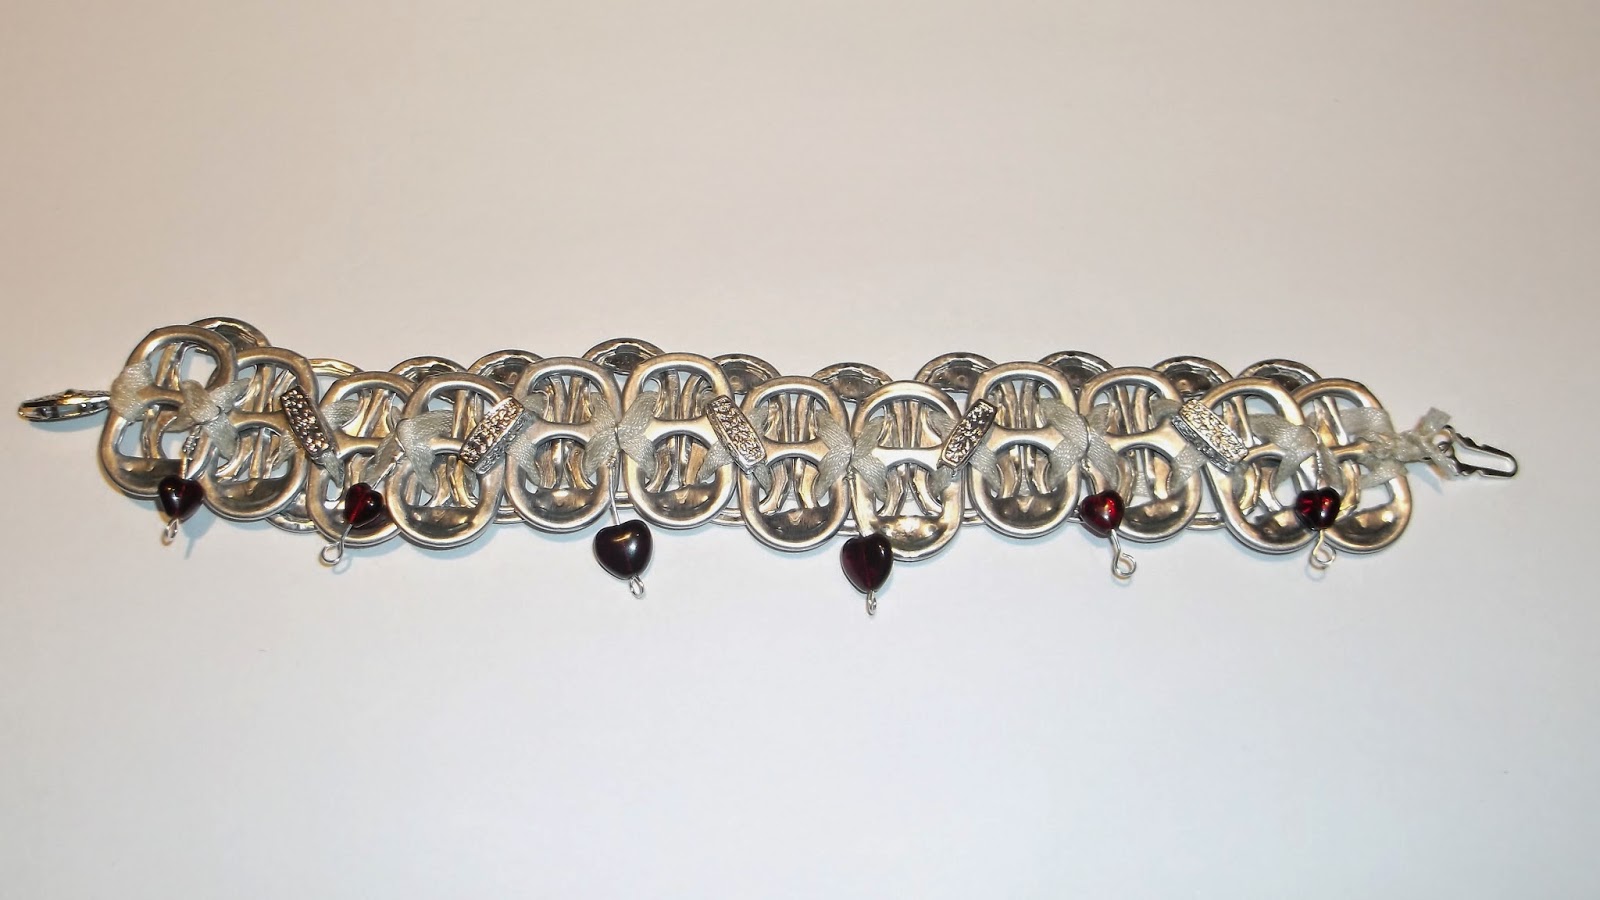
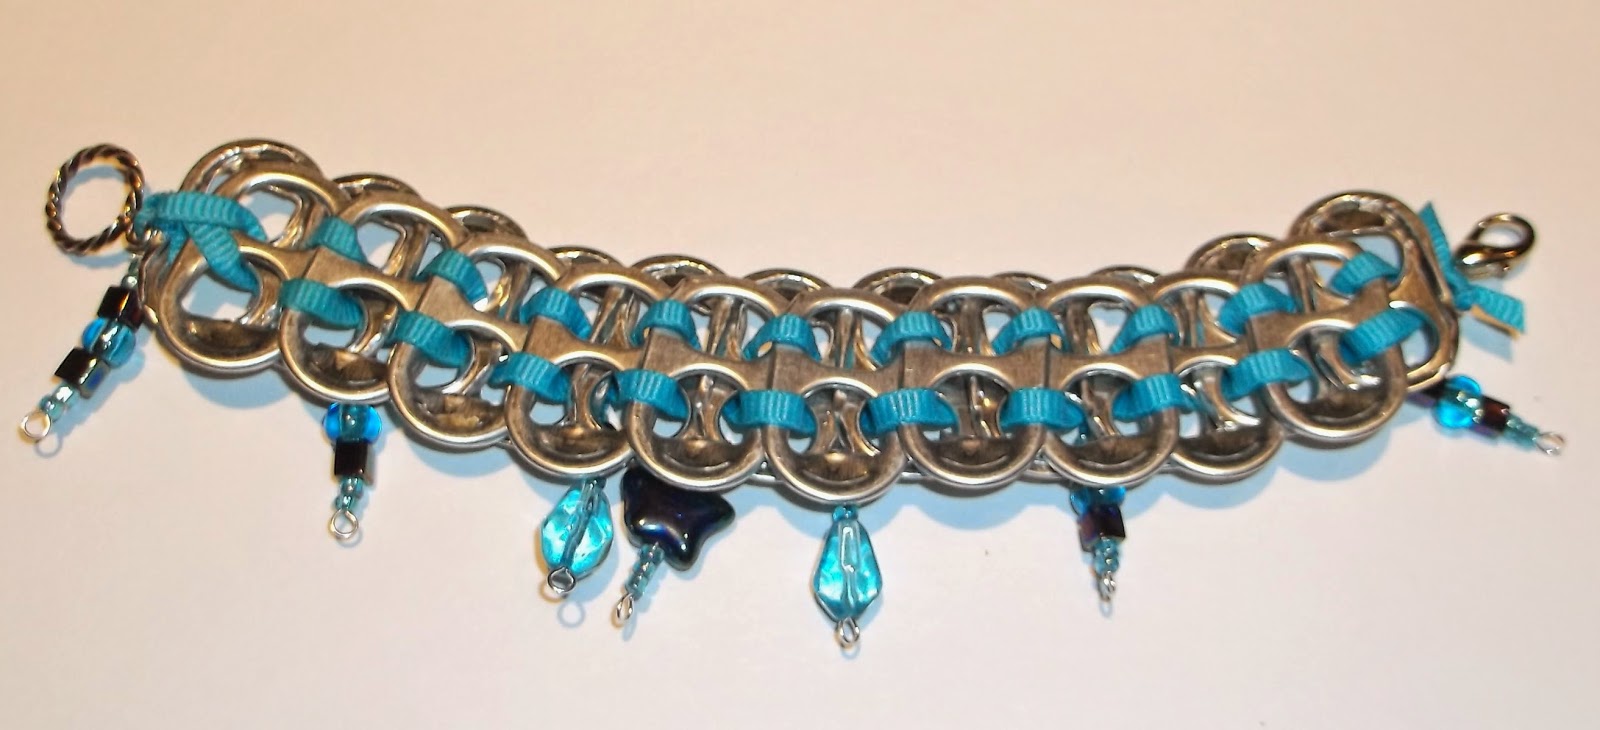
 Here's a fun summertime arts and crafts project to do with kids (or on your own).  It involves up-cycling soda can tops, also called pop tops, into bracelets.  This project is easy for both boys and girls and makes a great gift for the crafter or someone special in their lives.
While far from a traditional Waldorf craft, these pop top bracelets are woven together with ribbon and help children practice finger dexterity and patterns.  They show how "trash" can be turned into "treasure" and offer a unique starting point for a dialog about reducing, reusing and recycling. 
https://www.etsy.com/listing/191645994/red-heart-silver-bead-charm-pop-top
Before you begin you'll want to collect about 30 pop tops per bracelet.  Wash them and use a small hammer to flatten out any sharp edges.  If you're working with older kids they can help with this stage.  Next cut a piece of ribbon about 3 feet long and slide a clasp onto the ribbon letting it rest in the middle.
 Next tie the ribbon with the clasp onto the first pop top.
 Lay the tied pop top on top of an upside down pop top.  Be sure that the holes are opposite each other.  See the picture below where the small hole is on the bottom of the top pop top and on the top of the bottom one.  Rough sides face inside, the smooth sides of the pop tops face out.
 Now thread each side of the ribbon through the bottom pop top and then through the top pop top.  (In the picture below the pop tops from the above picture are flipped over.)
 Below is a picture of the pop tops flipped over again to see what it looks like when the ribbon comes up through the top pop top.
 Now get a third pop top and use the ribbon in a crisscross pattern to connect it to the first pop top, being sure to thread the ribbon down through the bottom pop top (the bottom pop top is the second one you put on).
 Get another pop top and place it next to the bottom one.  Weave the ribbon onto the new pop top and back up through the third pop top.  With the exception of the very first and very last pop top, the ribbon always goes through two pop tops at a time.
 Time to crisscross the ribbon again.  
If you like you can add an accent bead here.
 Keep up the pattern of weaving through the pop tops, crisscrossing on the top layer but not on the bottom.  The picture below is how the front or top layer should look. 
The picture below is how the back of the bracelet will look.  Remember that the smoother side of the pop tops always faces out, the rougher sides will touch each other.
https://www.etsy.com/listing/191651101/upcycled-pop-top-bracelet-with-blue
Once your bracelet is as long as you'd like it to be, put a knot in the ribbon and then attach the other side of the clasp.  If you don't have any clasps you can omit this step and simply tie the ribbon together.  You can use wire, string, or ribbon to attach more beads or charms to the bracelets.  Or keep going and make a necklace :)
https://www.etsy.com/listing/191645994/red-heart-silver-bead-charm-pop-top
 Thanks for visiting and happy crafting!
If you'd like to purchase either of the pieces displayed here, please visit my Waldorf on Etsy shop:  BeadCanyon
or connect with me on Facebook
Enjoy!

Monday, February 17, 2014

T-shirt Bag Tutorial


T-shirt Bag Tutorial
by Tania Prosser of Fairy Shadow
We all have them, the t-shirts that get left in the drawer month after month, year after year.  Maybe we think the color is unattractive, the neck a little too snug or too loose.  Maybe the design no longer calls out to us to be worn.  Whatever the reason, these shirts are good candidates for upcycling.  (Upcycling is the environmentally friendly art of taking unwanted materials and turning them into better, more useful materials.) Unwanted shirts make the perfect starting point to create your own alternative to plastic sacks.  These simple drawstring bags are easy to make and great for trips to the market, for holding your produce, to store toys, as beach bags, book bags, for environmentally conscious gifting and much, much more!
 
Getting Started:  Choosing Your Shirt
Choose a shirt that is made of jersey material rather than interlock fabric.  Jersey has a knit side and purl side.  Interlock has the “v” shape weave on both sides of the fabric.  The jersey will curl into the cord that will make your drawstring and interlock will not.  Choose a shirt with a sound hem at the bottom of the shirt.  It will form the casing for the cord to pass through.  
Step One:  Cut the Shirt
 
Make the first cut just below the arms of the shirt and then a second cut 1 ½" below the first cut.   
This narrow cut will be the drawstring of the bag.
https://www.etsy.com/shop/fairyshadow
Cut the sides off of both of these cuts, creating two strings and two panels.
https://www.etsy.com/shop/fairyshadow
Step 2:  Fold and Sew
Fold a panel in half and starting at the hem of the shirt sew a straight stitch down to the bottom.  A second seam closes the bag at the bottom, leaving the opening at the hemmed section. 
Step 3:   Thread the Drawstring
Turn the bag right side out.  At either side of the seam make a small hole in the top layer of the casing (hem).  Jersey stretches so it doesn’t need much of a hole to work. 
https://www.etsy.com/shop/fairyshadow
Take up your drawstring and stretch it to roll the fabric.  Using a safety pin or hair pin, thread the drawstring through the casing.  I like to use a contrasting colored drawstring.  Knot the ends together.  I like to add an embellishment by hand stitching a little circle onto each bag.
 
Step 4:  Get Creative
You can use this same technique with the sleeves of the t-shirt for small bags.   
These make nice dry lunchtime snack packs too.
 
Step 5:  Share with Your Community
This project is a great way to introduce children to upcycling.  If your school or community group holds a rummage sale you will often see hundreds of pounds of textiles being offered for sale, much of it going unsold and then donated to charity shops.  Every Goodwill sorting facility processes hundreds of tons of clothing a year.  Consider a class project in which the students harvest from your rummage sale before the final cleanup.  After washing the shirts will be ready for sewing.  If you have fund raising events the students could produce collections of bags to sell at those events, having the satisfaction of both recycling the garments and bringing funds to their school or community group.
A special thanks to Tania for sharing this wonderful upcycling project with us!
Be sure to visit her etsy shop, Fairyshadow for a wide array of upcycled creations.
Connect with Tania via Facebook
  Enjoy!